1. Choose an output folder
Open SourceShelf > Settings > General and choose an output folder. Converted Markdown is saved there. SourceShelf remembers access to the folder so later conversions can use it without another prompt.
Choose a folder that is easy to recognize and back up. SourceShelf also keeps local Library metadata and managed assets in its app container; changing the output folder does not move older Markdown files.
2. Convert files
Open Convert, then drag files into the drop area or choose Select Files. You can also use File > Open, convert an entire folder, or choose Import Research Pack… to import a SourceShelf package, OKF ZIP, portable llms.txt package, standalone llms.txt, or a folder containing llms.txt.
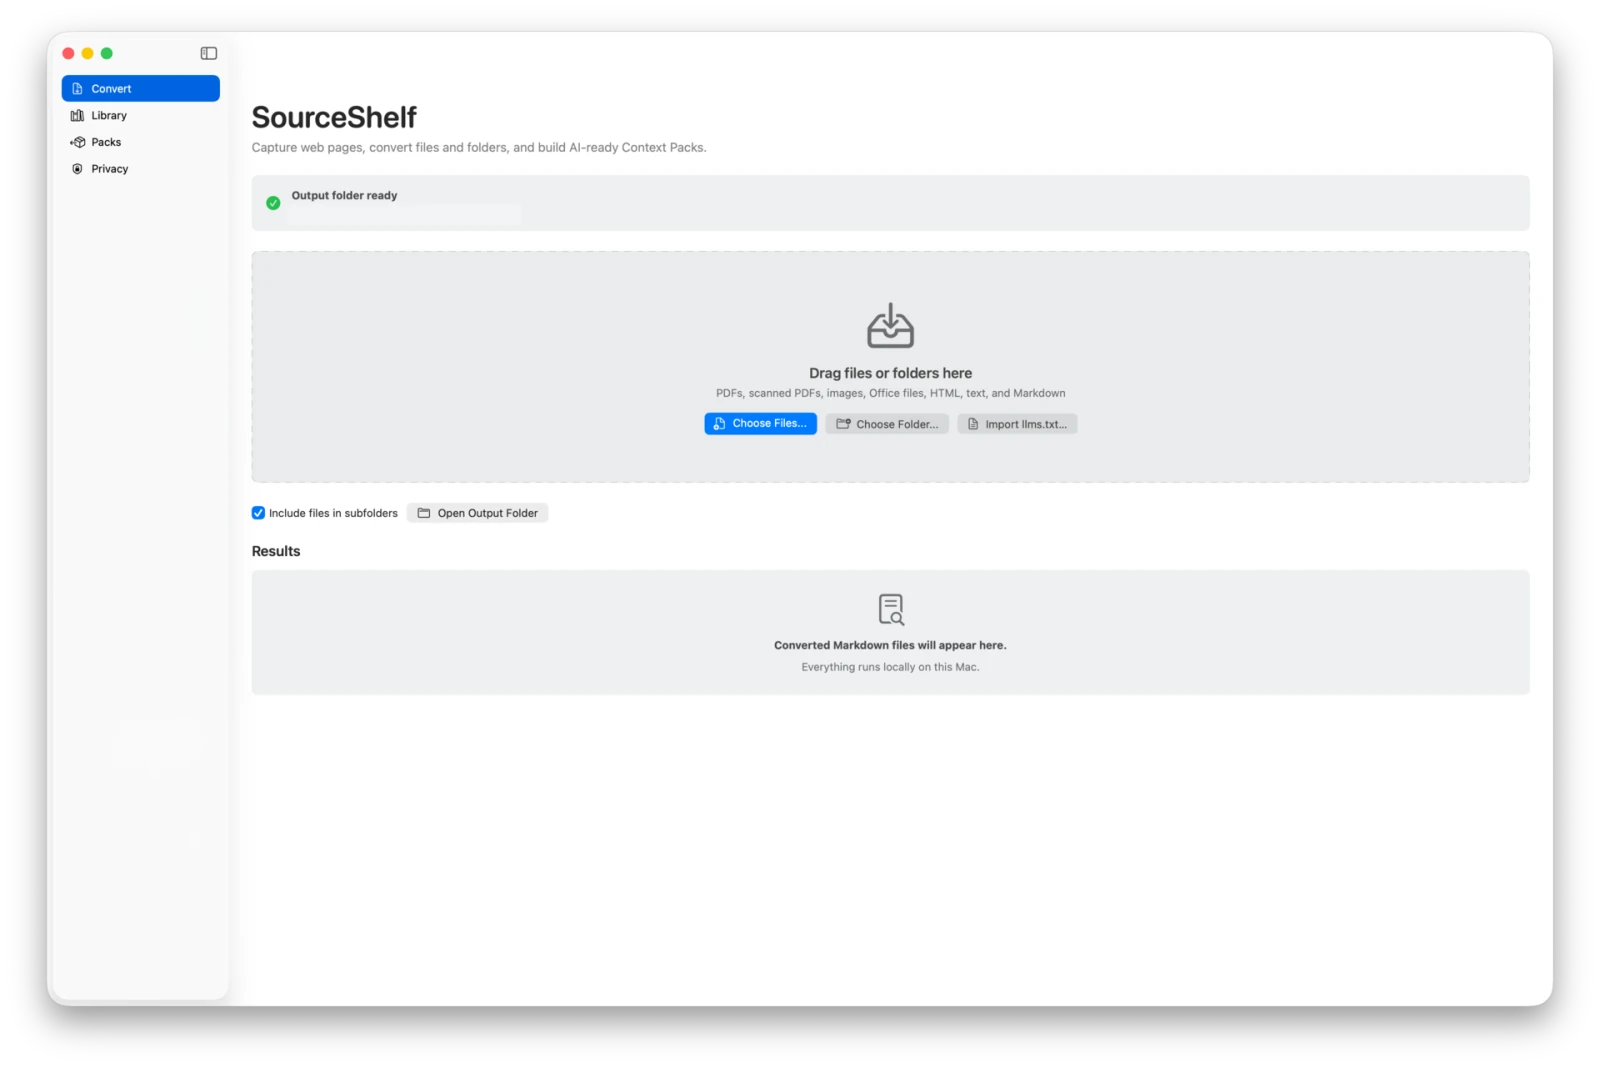
Each successful conversion creates:
- a Markdown file in the output folder;
- a Library entry with its title, source type, dates, and availability;
- managed semantic metadata used by previews, chunking, and comparison;
- archived assets when the source format or capture includes supported images.
The original file is not changed.
3. Review the Library
Open Library. Newly converted items appear at the top when grouped by date. Select an item to open the inspector. Use Preview for rendered content and Markdown Source for the exact stored Markdown, including YAML front matter.
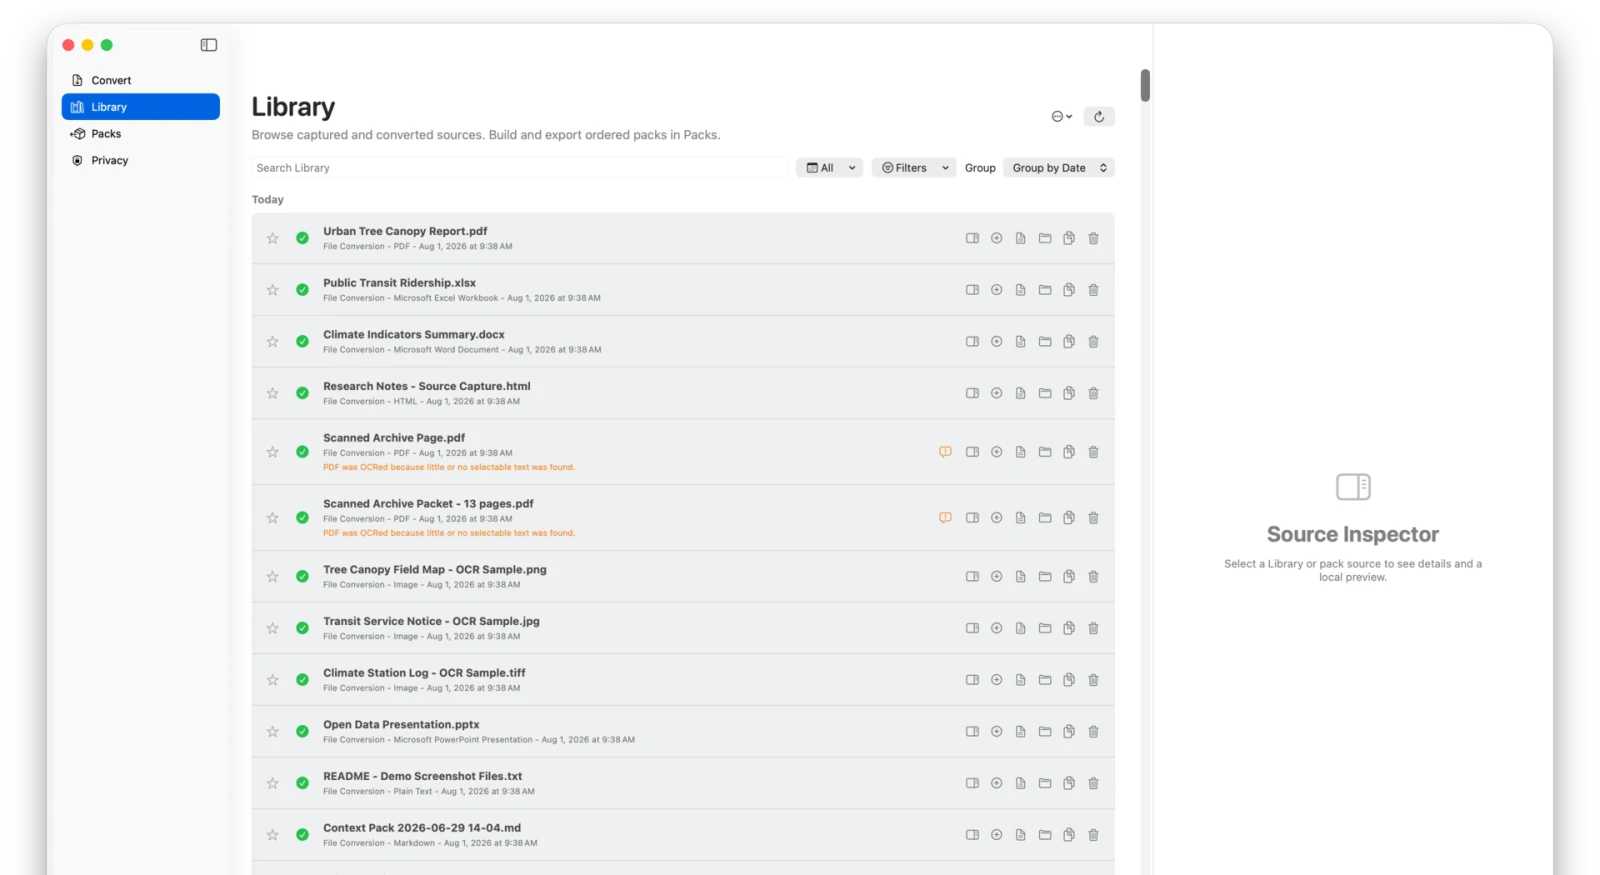
Library filters affect only what you see. They do not change the current pack.
4. Build a pack
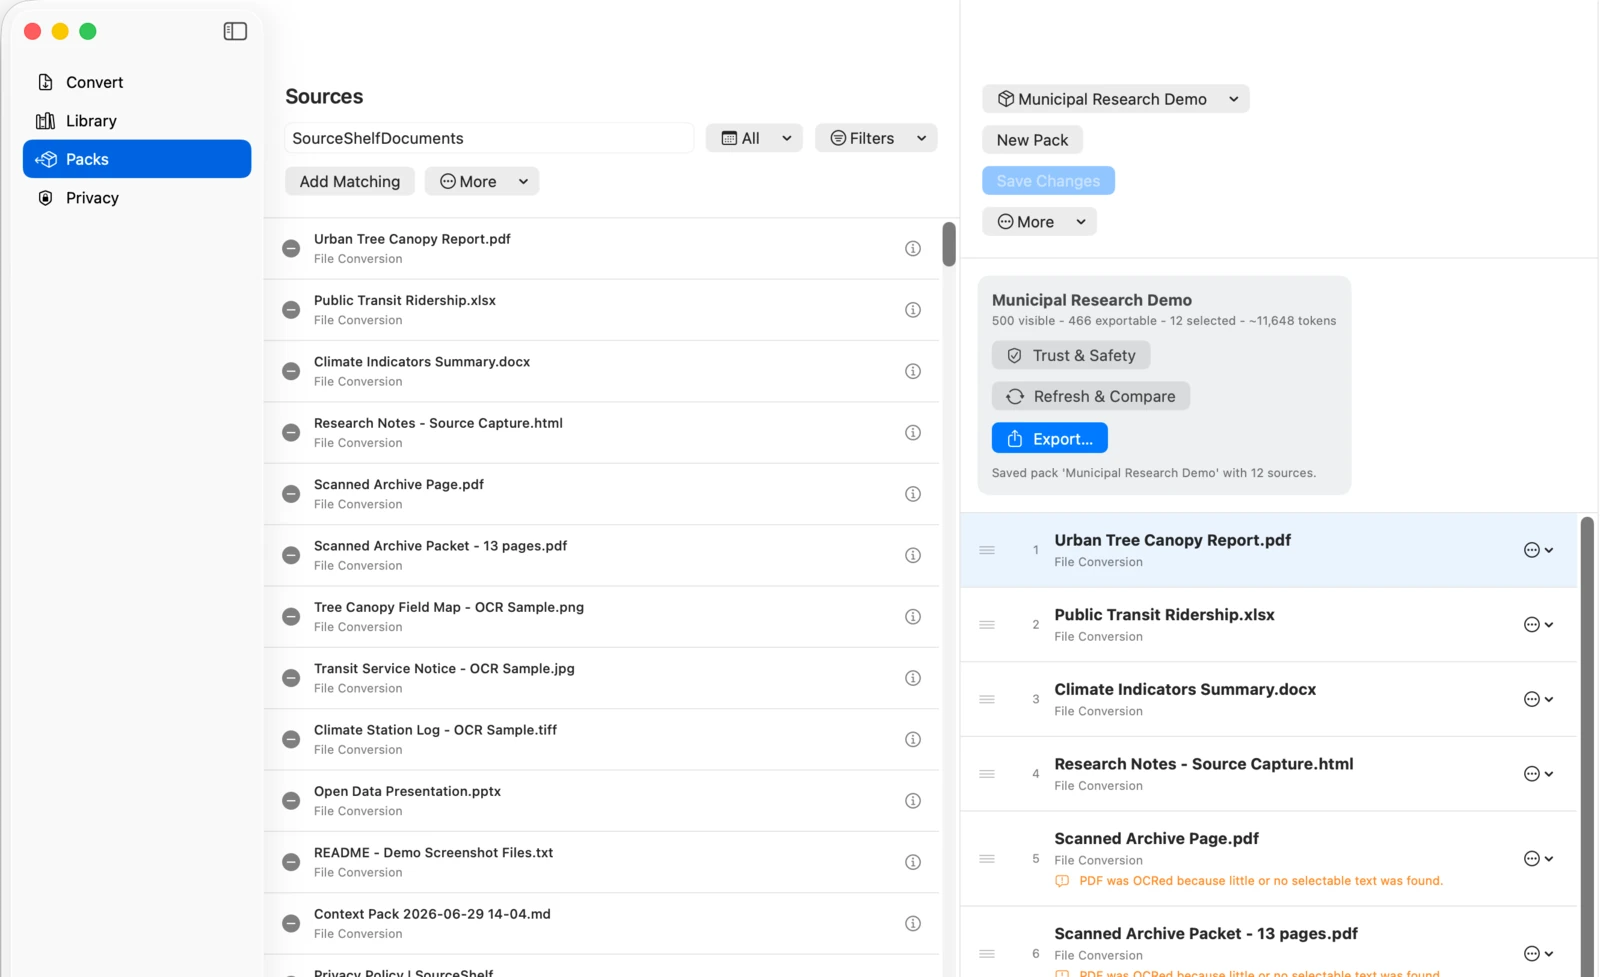
Open Packs. The left navigator lists every saved pack and includes a local Search Packs field, so pack discovery remains quick as the list grows. Choose New Pack, switch the center column to Add Sources, and find material with the existing Library search and filters. Pack search and Library-source search are independent.
Add individual sources or use:
- Add Matching for the current filters;
- Add All Exportable for every readable Library item;
- Add Since Last Export for items captured or converted after the last successful export.
Switch to Contents, then reorder the list by dragging items or using Move Up and Move Down. The displayed order becomes the export order and the order presented through Local AI Access. Selecting another saved pack updates Contents and keeps the inspected source only when it belongs to that pack.
Save the pack to give it a durable name and enable living-pack comparison, llms.txt folder generation, and MCP sharing. Save Changes, Refresh & Compare, Trust & Safety, and Export… stay visible in the workspace header. Use the gear-shaped Pack Actions menu for Save As, Rename, Local AI Access, and Delete.
5. Run Trust & Safety
Select Trust & Safety. SourceShelf checks source readability, naming and package structure, modification dates, web-source age, asset references, content hashes, and conservative patterns that may indicate prompt-injection language.
Warnings are advisory. SourceShelf preserves the original content and labels it as untrusted reference material; it does not claim to sanitize it.
6. Export
Select Export…, then choose the destination that matches your workflow:
- AI Reference Pack ZIP for AI chats, agents, and project workspaces;
- OKF v0.2 Bundle ZIP for standards-based catalogs and agents;
- Markdown Context Pack for one portable file;
- Portable llms.txt Package ZIP for a complete collection that can move between SourceShelf devices;
- llms.txt Collection Folder for an ordered, inspectable folder;
- Copy Combined Markdown for a quick paste.
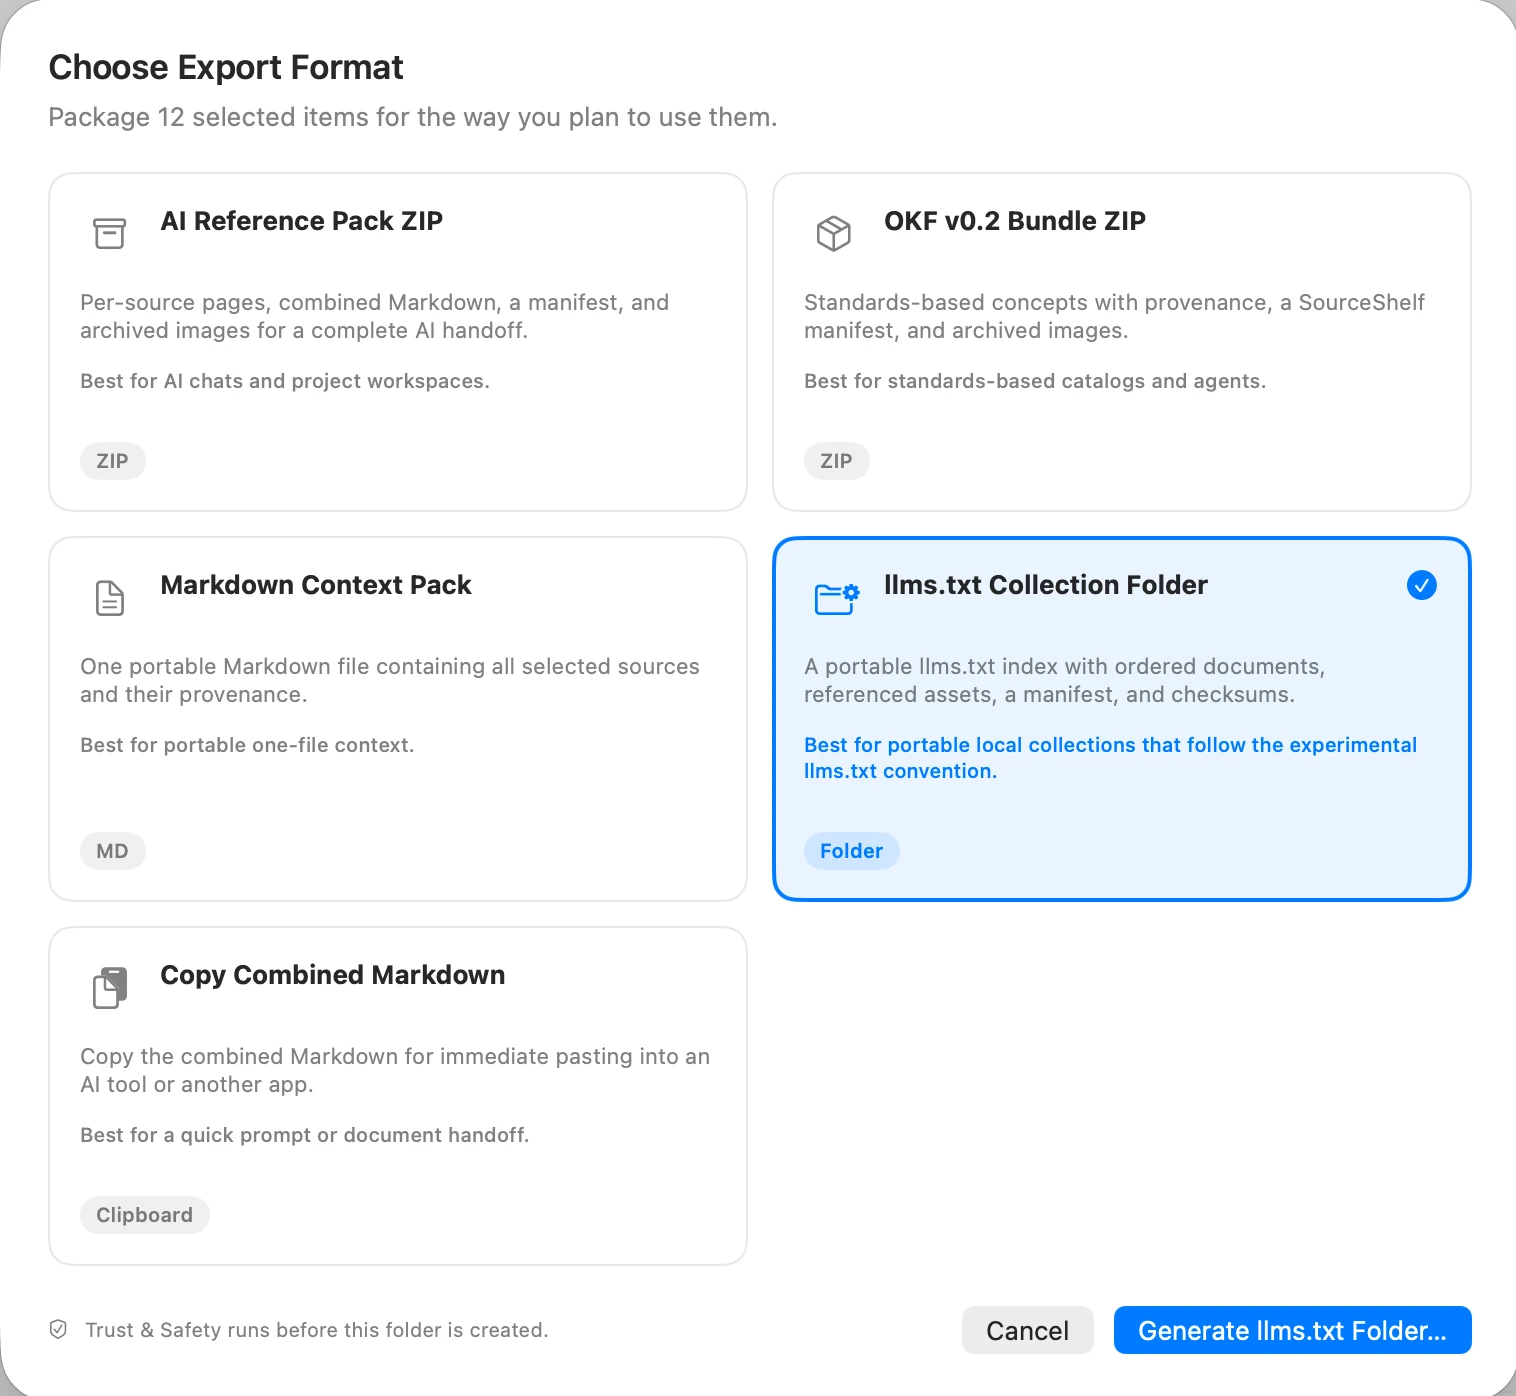
ZIP and llms.txt folder exports run a fresh Trust & Safety check. Markdown and clipboard exports begin immediately. A successful export records a local baseline for Refresh & Compare.
Next steps
- Capture web research with the Safari extension.
- Connect a saved pack to a local AI app with Local AI Access.
- Learn what each bundle contains in Choose an export format.
- Learn how retention and cleanup work in Manage SourceShelf Storage.